mouse 제어하기
페이지정보
내용
mouse 제어하기
pygame에서는 pygame.mouse 모듈을 통해서 mouse에 대한 처리를 한다.
출처 : https://www.pygame.org/docs/ref/mouse.html
1. mouse 모듈의 메서드
1) pygame.mouse.get_pressed()
마우스의 button1, button2, button3 상태를 0 또는 1로 튜플로 반환한다.
button1 : 왼쪽 마우스 버튼 (눌렸을 때는 1, 아니면 0 )
button2 : 가운데 버튼(휠) (눌렸을 때는 1, 아니면 0 )
button3 : 오른쪽 마우스 버튼 (눌렸을 때는 1, 아니면 0 )
pygame.mouse.get_pressed() -> (0, 0, 0)
이 메서드는 이벤트 중에서 MOUSEBUTTONDOWN, MOUSEBUTTONUP, MOUSEMOTION 이벤트 타입안에서 처리를 해준다. 나머지 메서드는 코드 어느곳에서 실행해도 된다.
2) pygame.mouse.get_pos()
마우스의 포지션 x, y 값을 튜플로 반환한다.
pygame.mouse.get_pos() -> (123, 345)
3) pygame.mouse.get_rel()
마우스의 이동 값을 계산하여 튜플로 반환한다. 다만 이전의 get_rel() 메서드가 호출된 이후의 이동 값이다.
즉, 처음 get_rel() 값은 (0,0)이며, 이후 get_rel() 호출하면 x, y의 이동한 값을 반환한다.
pygame.mouse.get_pos() -> (100,200)
pygame.mouse.get_rel() -> (0,0)
# 마우스 이동 후
pygame.mouse.get_pos() -> (134, 256)
pygame.mouse.get_rel() -> (34, 56)
4) pygame.mouse.set_pos( [x, y] )
마우스 커서 포지션을 지정한다.
pygame.mouse.set_pos( [34, 56] )
5) pygame.mouse.set_visible(bool)
SCREEN 안에서 마우스 커서를 보이게 또는 안 보이게 한다.
pygame.mouse.set_visible(True) -> 마우스 커서 보임
pygame.mouse.set_visible(False) -> 마우스 커서 안보임
6) pygame.mouse.get_visible()
마우스 커서의 보임 상태를 반환한다.
(pygame 2.0.0 이후 적용)
pygame.mouse.get_visible() -> True : 마우스 커서가 보이는 상태
pygame.mouse.get_visible() -> False: 마우스 커서가 안 보이는 상태
7) pygame.mouse.get_focused()
마우스 입력을 받을 수 있는지를 나타내는 메서드. 마우스 커서가 SCREEN안에 있는가 없는가를 판단
pygame.mouse.get_focused() -> 1 : 마우스 커서가 SCREEN 안에 있음
pygame.mouse.get_focused() -> 0 : 마우스 커서가 SCREEN을 벗어나 있음
8) pygame.mouse.set_cursor()
마우스 커서의 이미지를 세팅한다.
pygame.mouse.set_cursor(size, hotspot, xormasks, andmasks) -> None
좀 더 간단한 방법으로 pygame의 마우스 커서를 넣는다.
pygame.cursor 종류
| pygame.cursors.arrow pygame.cursors.diamond pygame.cursors.broken_x pygame.cursors.tri_left pygame.cursors.tri_right |
pygame.mouse.set_cursor(*pygame.cursors.diamond)
## set_cursor() 메서드는 여러 개의 argument를 받으므로, pygame.cusors의 튜플값을 분리하여 입력하기 위해 * 를 앞에 붙인다.
출처 : https://www.pygame.org/docs/ref/cursors.html
9) pygame.mouse.get_cursor()
시스템 마우스 커서의 이미지를 반환
pygame.mouse.get_cursor() -> ((16, 16), (0, 0), (0, 0, 64, 0, 96, 0, 112, 0, 120, 0, 124, 0, 126, 0, 127, 0, 127, 128, 124, 0, 108, 0, 70, 0, 6, 0, 3, 0, 3, 0, 0, 0), (192, 0, 224, 0, 240, 0, 248, 0, 252, 0, 254, 0, 255, 0, 255, 128, 255, 192, 255, 224, 254, 0, 239, 0, 207, 0, 135, 128, 7, 128, 3, 0))
2. mouse로 image를 움직이는 전체 코드
https://www.jbmpa.com/pygame/8의 전체 코드에서 마우스로 이미지를 제어하는 코드를 추가한다.
|
import pygame
# 스크린 전체 크기 지정 SCREEN_WIDTH = 400
# pygame 초기화 pygame.init()
# 스크린 객체 저장
# FPS를 위한 Clock 생성
# 이미지 로딩 및 크기 변경 player = pygame.image.load("Player.png")
# 이미지의 Rect 정보를 저장 player_Rect = player.get_rect()
# 이미지가 가운데 올 수 있도록 좌표값 수정 # python 3.8 이상에서 integer가 필요한 곳에 float가 들어가면 DeprecationWarning이 나옴. # 따라서 round() 처리를 해준다. player_Rect.centerx = round(SCREEN_WIDTH / 2) player_Rect.centery = round(SCREEN_HEIGHT / 2)
dx = 0 dy = 0
# 마우스로 이미지를 옮기기 위한 flag MOVE = False
playing = True # 이벤트 처리 if event.type == pygame.QUIT:
# 마우스 버튼이 눌렸을 때 # 마우스의 포지션을 받아서 mouse_pos에 저장 mouse_pos = pygame.mouse.get_pos() # 마우스 포지션이 image의 Rect 안에 들어오는지 체크 # mouse_pos[0]은 x, mouse_pos[1]은 y 좌표값. # 마우스 포지션이 Image의 Rect안에 있으면 MOVE를 True로 전환 # 마우스 커서의 모양을 깨진 X 모양으로 변경
# 마우스 버튼이 올라갔을 때 # 마우스 커서의 모양을 기본값인 화살표 모양으로 변경
# 마우스가 SCREEN안에서 움직일 때 if event.type == pygame.MOUSEMOTION: x, y, z = pygame.mouse.get_pressed() # 왼쪽 마우스버튼이 눌려있는 상태일 때
# 키가 눌렸을 때 if event.type == pygame.KEYDOWN: if event.key == pygame.K_UP:
# 키가 떼졌을 때 if event.key == pygame.K_UP:
# 스크린 배경색 칠하기 SCREEN.fill((255, 255, 255))
# 키에 의해 증가된 값을 이미지의 좌표에 적용시킨다. player_Rect.x += dx player_Rect.y += dy
# 왼쪽으로 벗어나는 것 방지 if player_Rect.left < 0:
# 오른쪽으로 벗어나는 것 방지 if player_Rect.right > SCREEN_WIDTH:
# 위쪽으로 벗어나는 것 방지 if player_Rect.top < 0:
# 아래쪽으로 벗어나는 것 방지 if player_Rect.bottom > SCREEN_HEIGHT:
# 스크린의 원하는 좌표에 이미지 복사하기, 좌표값은 Rect를 이용 SCREEN.blit(player, player_Rect)
# 작업한 스크린의 내용을 갱신하기 pygame.display.flip()
# 1초에 60번의 빈도로 순환하기 clock.tick(60) |
결과
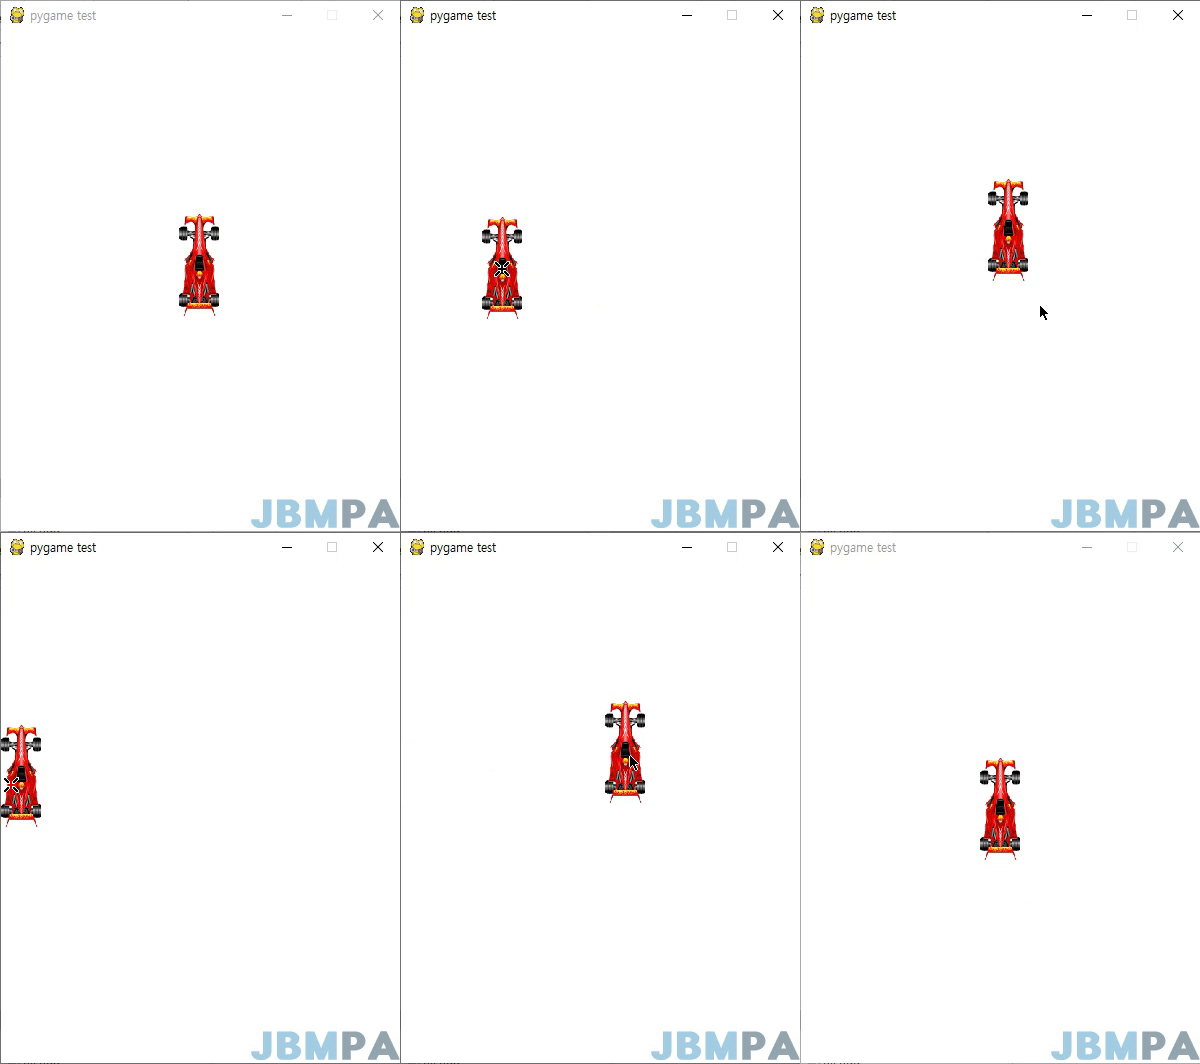
마우스로 Player를 클릭하여 이동이 되는지 확인한다.


