QPushButton, QLineEdit, QLabel - 위젯 기본 사용법
페이지정보
내용
QPushButton 위젯, QLineEdit 위젯, QLabel 위젯 사용법
pyside2는 Qt 프로젝트에서 파생되어서, 클래스명 앞에 대문자 Q가 붙는다.
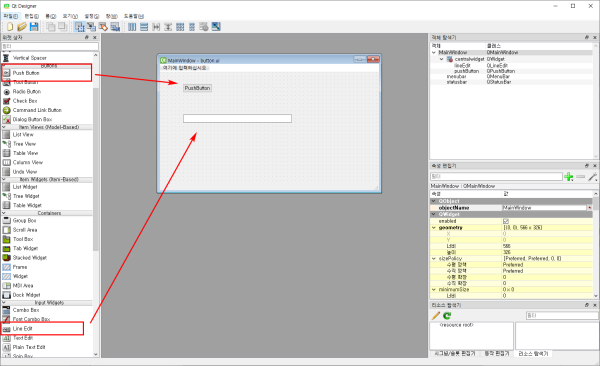
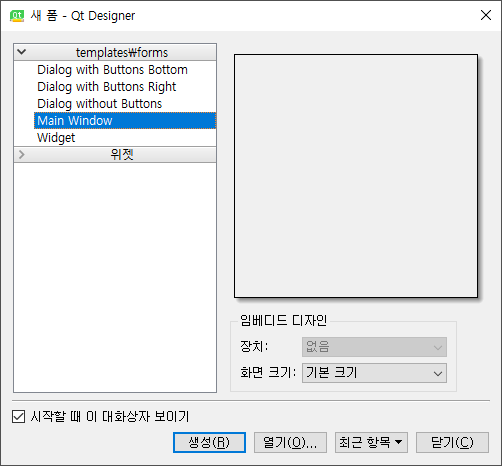
1. qt designer를 실행하여 폼을 한개 만든다.
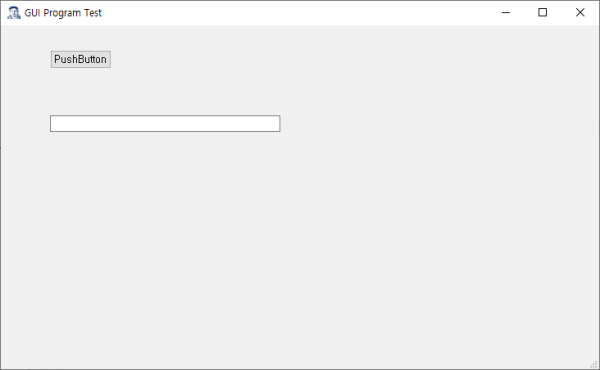
2. Push Button 과 Line Edit를 폼에 위치 시킨다. 클릭하여 드래그하면 된다.
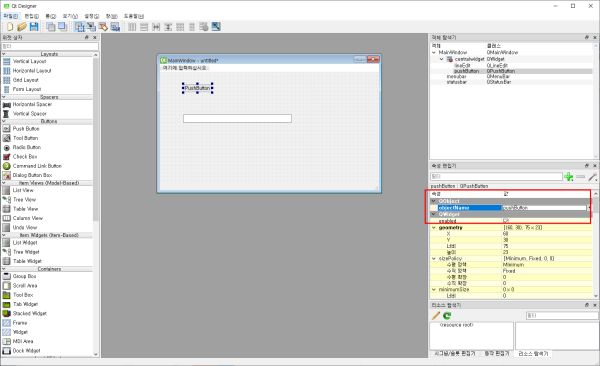
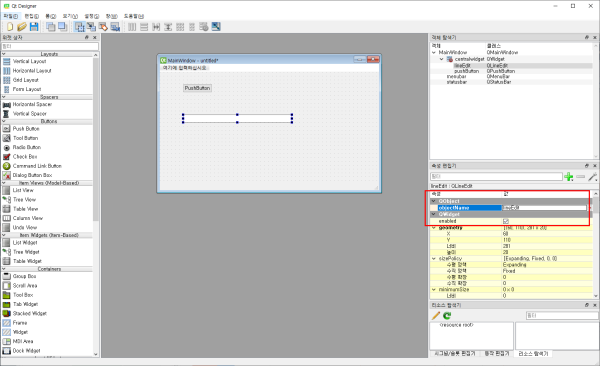
3. Button의 objectName과 Line Edit의 objectName을 입력한다. ObjectName은 하나의 폼에서 유일해야 한다. 이름이 중복되면 안된다. 프로그램 코드에서 위젯을 구분하는 방법이기 때문이다.
Object Name
Push Button : pushButton
Line Edit : lineEdit
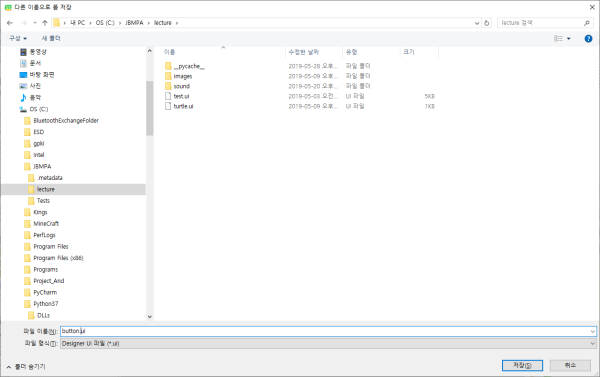
4. 이클립스에서 지정한 프로젝트가 있는 폴더에 저장한다.
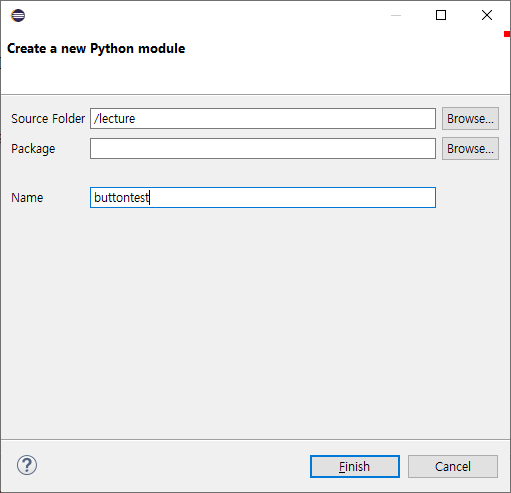
5. 이클립스에서 buttontest 모듈을 생성하고, 기본 코드를 복사해서 입력한다.
새로운 모듈 생성
기본코드 : https://www.jbmpa.com/pyside6/2
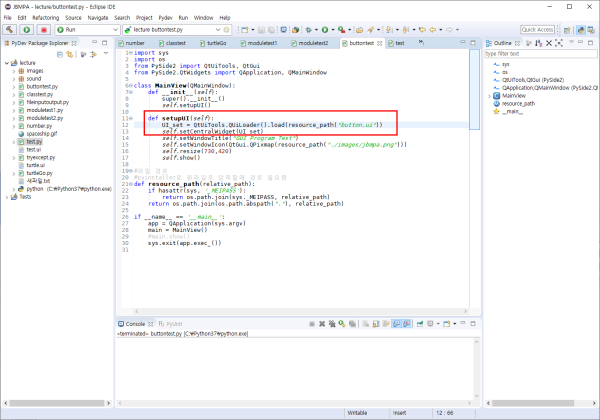
기본코드에서 1-4번에서 저장한 UI 파일 이름을 연결해준다. UI 파일 이름은 button.ui 이다.
UI_set 이라는 변수는 5번에서 생성한 UI 파일을 모두 담고있는 객체가 된다.
| UI_set = QtUiTools.QUiLoader().load(resource_path("button.ui")) |
Ctrl + F11 을 눌러서 정상적으로 실행되는지 확인한다.
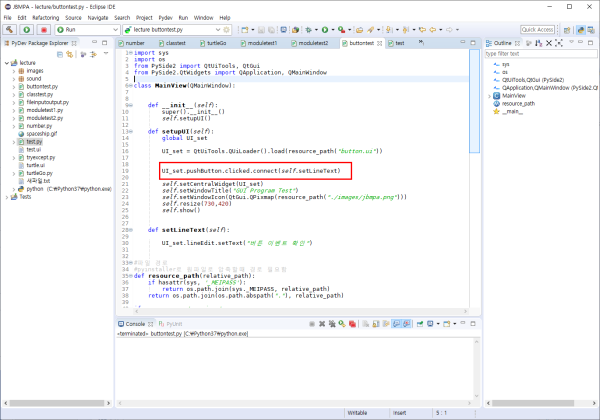
6. Button에 clicked 이벤트를 연결한다.
| UI_set.pushButton.clicked.connect(self.setLineText) |
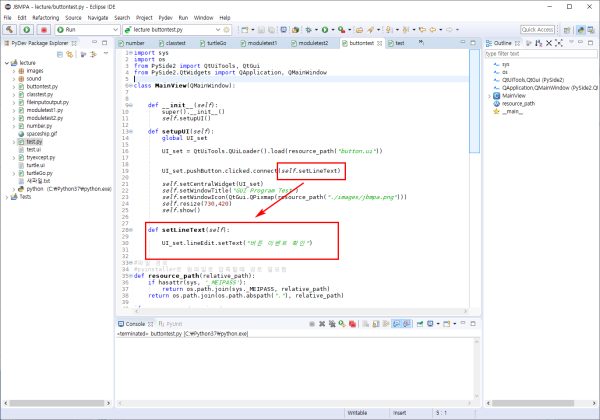
위의 코드는 UI_set이라는 UI 객체에 있는 pushButton이라는 이름을 가진 위젯을 Click 했을 때(clicked), setLineText라는 메서드로 연결한다(connect)는 의미이다.
다시 말하면, Button 위젯을 클릭 이벤트로 setLineText 함수로 연결하는 코드이다.
7. Button을 클릭했을 때, setLineText 메서드가 실행된다.
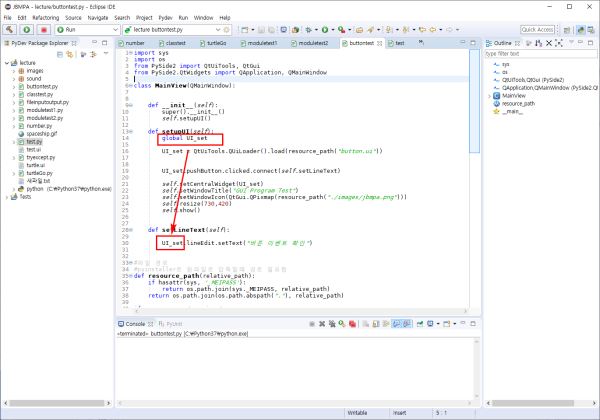
하지만 def setupUI(self) 메서드에서 설정한 UI_set은 내부 변수이다. 따라서 다른 메서드인 def setLineText(self)에서 사용하기 위해서는 global 선언을 해줘야한다.
def setupUI(self) 메서드에 global UI_set을 추가한다.
|
def setupUI(self): global UI_set |
8. setLineText 메서드는 Line Edit 위젯에 글자를 입력하는 메서드이다.
1-4번에서 생성한 Line Edit 위젯의 이름은 lineEdit이다.
글자의 입력은 Line Edit 객체의 setText 메서드를 사용한다.
따라서 UI_set 객체의 lineEdit라는 위젯에 글자를 입력한다는 의미가 된다.
| def setLineText(self): UI_set.lineEdit.setText("버튼 이벤트 확인") |
※ 위젯마다 조금씩 다르지만, 대부분 Text와 관련된 위젯에 글을 입력하는 메서드는 setText(str), 입력된 글자를 받아오는 메서드는 text()이다.
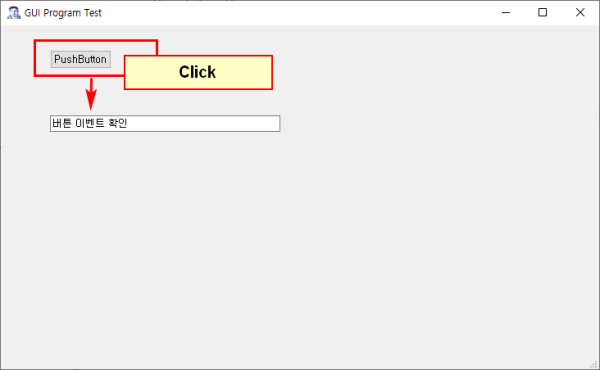
9. 프로그램을 실행한다. (Ctrl + F11)
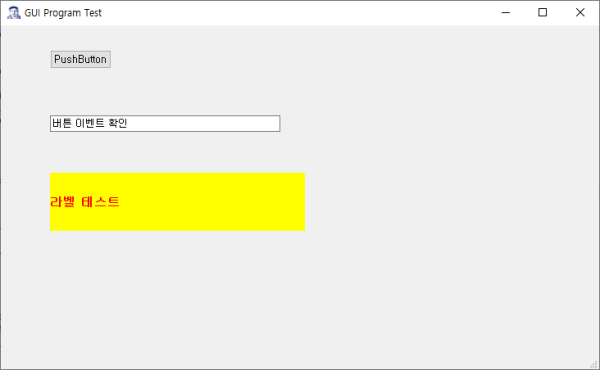
Button 클릭시, Line Edit에 글자가 입력되는 것을 확인한다.
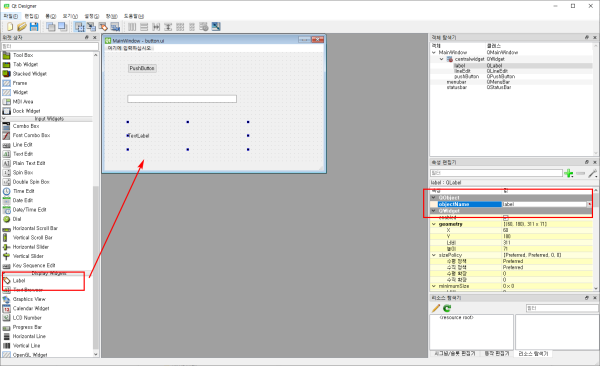
10. qt designer를 열어서 button.ui 폼에 Label 위젯을 추가한다.
Label Object Name = label
11. def setLineText() 메서드를 수정한다.
| def setLineText(self): UI_set.lineEdit.setText("버튼 이벤트 확인") UI_set.label.setText("라벨 테스트") UI_set.label.setStyleSheet("background-color:yellow;color:#FF0000;font-size:15px;font-weight:bold") |
Label 위젯도 lineEdit와 마찬가지로 setText를 통해 문자열을 입력한다.
그리고 문자열의 스타일은 setStyleSheet로 꾸며준다. 입력한 스타일의 의미는 다음과 같다.
background-color:yellow; - 배경색은 노란색
color:#FF0000; - 글자색은 빨간색 ( #FF0000 은 색상 코드로 빨간색을 나타낸다.)
font-size:15px; - 글자크기는 15pt로
font-weight:bold - 글자는 굵게
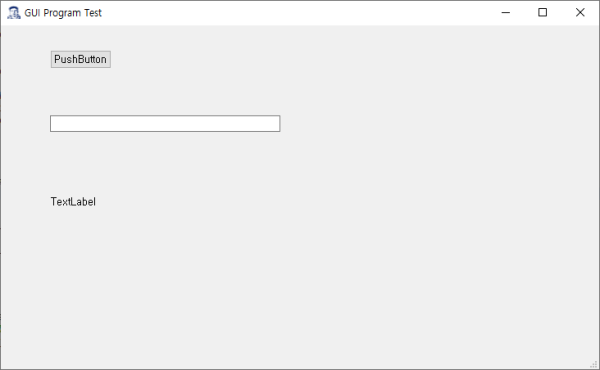
12. 프로그램을 실행한다. (Ctrl + F11)
버튼을 누르면 문자열과 스타일이 적용되는 것을 볼 수 있다.
버튼 클릭!
13. 전체 코드
|
import sys
class MainView(QMainWindow):
def setupUI(self): UI_set.pushButton.clicked.connect(self.setLineText)
UI_set.label.setText("라벨 테스트") #파일 경로 |
요약
이벤트 연결 방법
|
기본 형태) UI객체.위젯객체.이벤트.connect(연결할 메서드)
예) UI_set.pushButton.clicked.connect(self.setLineText) |
이벤트는 신호(Signal), 연결한 메서드는 슬롯(Slot)
문자열 관련 위젯 문자열 입력
|
기본 형태) UI객체.위젯객체.setText(문자열)
예) UI_set.lineEdit.setText("버튼 이벤트 확인") |
위젯 스타일 설정
|
기본 형태) UI객체.위젯객체.setStyleSheet(스타일)
예)
※ Button 위젯도 스타일쉬트로 스타일 변경할 수 있음 |
QPushButton, QLineEdit, QLabel - 위젯 기본 사용법 끝
출처 :
QPushButton - https://doc.qt.io/qtforpython/PySide6/QtWidgets/QPushButton.html
https://doc.qt.io/qtforpython/PySide6/QtWidgets/QAbstractButton.html
QLineEdit - https://doc.qt.io/qtforpython/PySide6/QtWidgets/QLineEdit.html
QLabel - https://doc.qt.io/qtforpython/PySide6/QtWidgets/QLabel.html


